Electroplating zinc yourself: A guide to an easy DIY project!
Attention DIY lovers: Galvanising yourself is easier than you think! With our instructions, you'll get a detailed overview of the basics of galvanising and the benefits it brings. Let's get started on an exciting DIY project!
Introduction
Hey there! Want to learn how to electro-galvanise your own metal parts? Then you've come to the right place! In this guide, we'll show you step by step how to do your DIY project. But before we get started, we'd like to explain what electro-galvanising actually means. It is a process in which a protective layer is applied to the metal to protect it from corrosion. This protective layer is made of zinc and is applied to the metal through a chemical reaction. Now you know what to expect - let's get started!
What is galvanising with zinc?
Galvanising is a process in which a layer of zinc is applied to a metal to protect it from corrosion. It is one of the most commonly used methods of protecting steel and iron against rust. The process works by electrolysis, where the metal is immersed in a zinc solution and an electric charge is passed through the metal. This causes the zinc from the solution to be applied to the metal, creating a protective coating. Galvanising is an inexpensive and effective way to protect metals from corrosion and is also suitable for DIY projects. With some basic knowledge and tools, you can do your own galvanising projects at home.
Make preparations
Before you start galvanising, you should make some preparations to ensure a successful DIY project. Firstly, make sure you have all the necessary materials and tools to hand, such as a zinc anode, a galvanising bath, a power source and protective gloves. It is also important that you set up a suitable workplace that is well ventilated and has no flammable materials nearby. Before you start the galvanising process, you must ensure that the object to be galvanised is thoroughly cleaned and degreased to ensure optimal adhesion of the zinc coating. Remember that safety is paramount and you should always wear protective gloves and goggles to avoid injury. With these preparations, you are ready to successfully complete your DIY galvanising project.
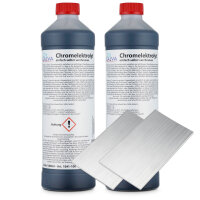
Get tools and materials for galvanising
To successfully complete your DIY galvanising project, you will need the right tools and materials. First, you should choose a suitable galvanising solution, which you can purchase from us. A suitable container in which you can mix the galvanising bath and immerse the object to be galvanised is also very important. For example, a plastic container or an old stainless steel pot is suitable. Another important tool is a rectifier, which regulates the current strength and thus enables an even galvanising result. You also need an anode, which is made of zinc and is hung in the galvanising bath. This serves as a current source and ensures that the zinc is deposited on the object to be galvanised. To clean the object thoroughly before galvanising, it is advisable to use sandpaper and cleaning agents such as isopropanol. With these tools and materials, you are well equipped to successfully complete your DIY galvanising project.
Prepare and grease the surface
Before you can start the actual galvanising process, you need to make sure that the surface of the object to be galvanised is smooth and clean. To do this, you should clean it thoroughly and remove any rust. Then you should lightly roughen the surface with a wire brush or sandpaper to ensure better adhesion of the zinc coating. To achieve the best result, it is also advisable to treat the surface with a suitable grease or oil before galvanising. This prevents the zinc from sticking to unwanted areas and prevents unsightly drops or uneven layers. Make sure that you only use special greases or oils that are suitable for the galvanising process. With thorough surface preparation and careful treatment with grease or oil, nothing will stand in the way of a successful DIY project.
Carry out the galvanising process
Before you start galvanising, make sure you have all the necessary materials and tools to hand. These include a zinc anode set, a DC power supply, a plastic container, zinc electrolyte and gloves to protect against chemicals. First, you need to thoroughly clean and degrease the object to be galvanised to ensure optimal adhesion of the zinc layer. Then connect the object to the DC power supply as a cathode and immerse it in the zinc electrolyte. The zinc anode serves as an anode and releases zinc ions, which are deposited on the object and form a protective layer. The longer the object remains in the electrolyte, the thicker the zinc layer becomes. After galvanising, the object should be thoroughly rinsed and dried. With a little practice and patience you can do a professional zinc coating at home.
Aftercare of the parts after galvanising
After you have successfully galvanised your parts, it is important to treat them properly to ensure their durability and aesthetics. First, rinse the parts thoroughly with water to remove excess zinc residue. Then you can clean them with a mild detergent and a soft cloth to remove any dirt residues. Afterwards, you should let the parts dry thoroughly before you seal them with a protective layer. A special spray or a wax or oil sealant is suitable for this purpose. The protective coating protects the parts from corrosion and gives them a shiny appearance. Note, however, that the after-treatment can vary depending on the type of parts and the galvanisation. Therefore, find out the recommended steps for your specific project beforehand.
Avoid DIY galvanising mistakes
If you decide to galvanise your DIY project, there are a few mistakes you should avoid to get the best possible results. One common mistake is not cleaning the item to be galvanised properly. It is important to remove all grease and oil residues, as these can affect the adhesion of the zinc coating. Removing rust and other contaminants is also an important step to achieve an even and durable zinc coating. Another mistake is insufficient preparation of the electrolyte solution. It is important to use the right amounts of zinc and hydrochloric acid to ensure optimal conductivity. Choosing the right current is also crucial to achieve an even zinc layer. If you avoid these mistakes, you can be sure that your DIY galvanising project will be a complete success.
Conclusion: Do-it-yourself galvanising - a rewarding DIY project!
Conclusion: Galvanising yourself - a worthwhile DIY project! In summary, galvanising yourself is a worthwhile DIY project. Not only is it cheaper than hiring a professional service provider, but it is also a great way to familiarise yourself with the technique of galvanising. With a little practice and patience, even beginners can quickly achieve good results. However, it is important to take the necessary safety precautions and follow the instructions. So anyone who is looking for a new DIY project and is interested in metalworking should definitely give galvanising a try.